Pin It
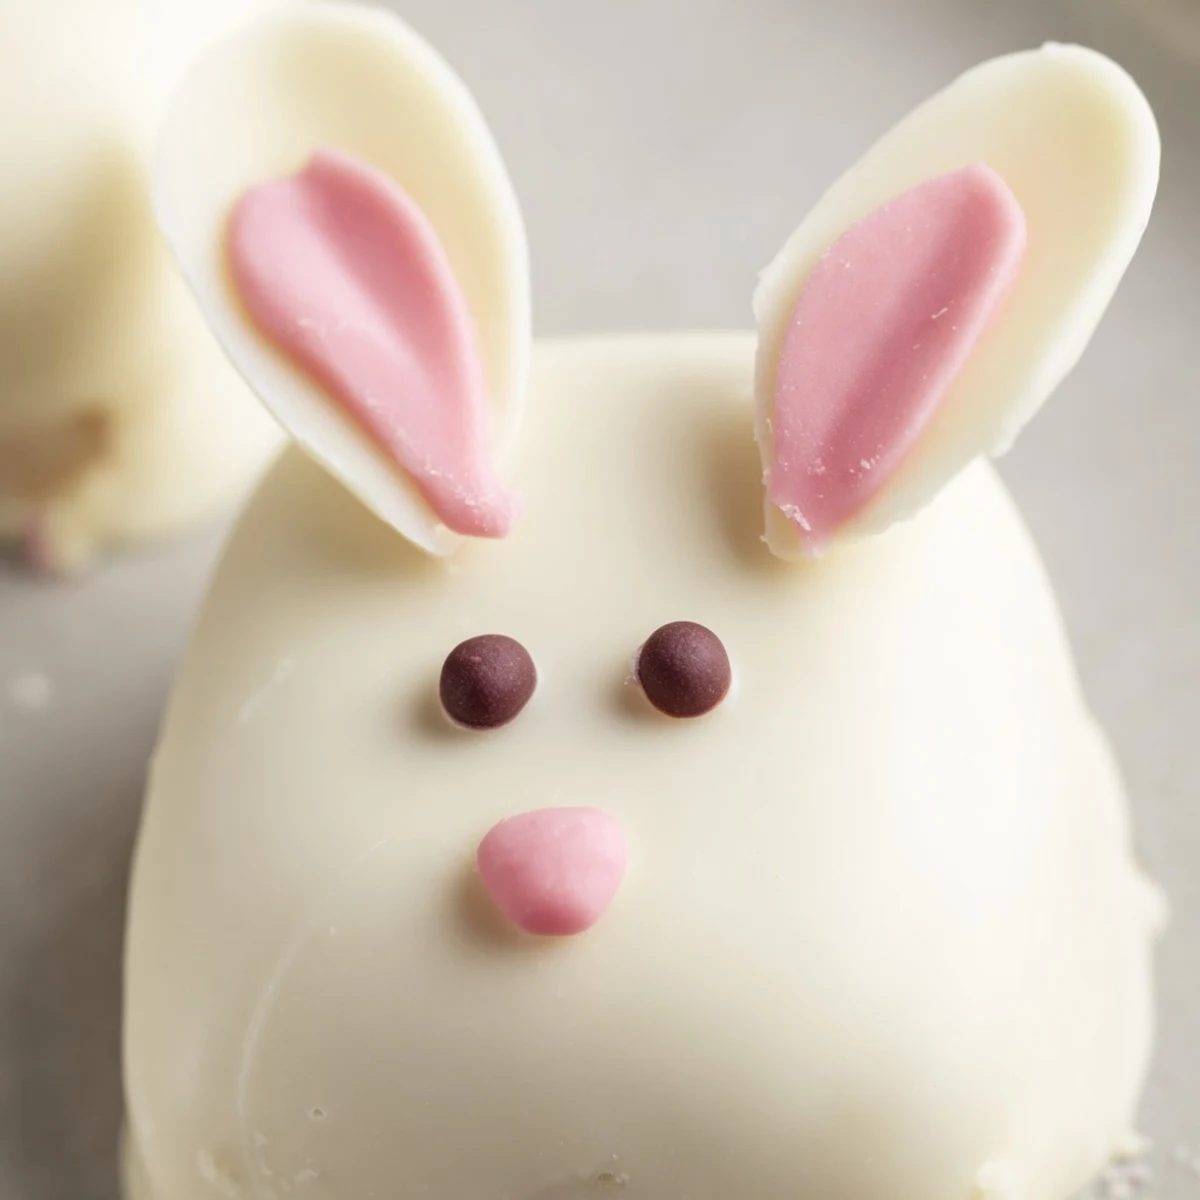
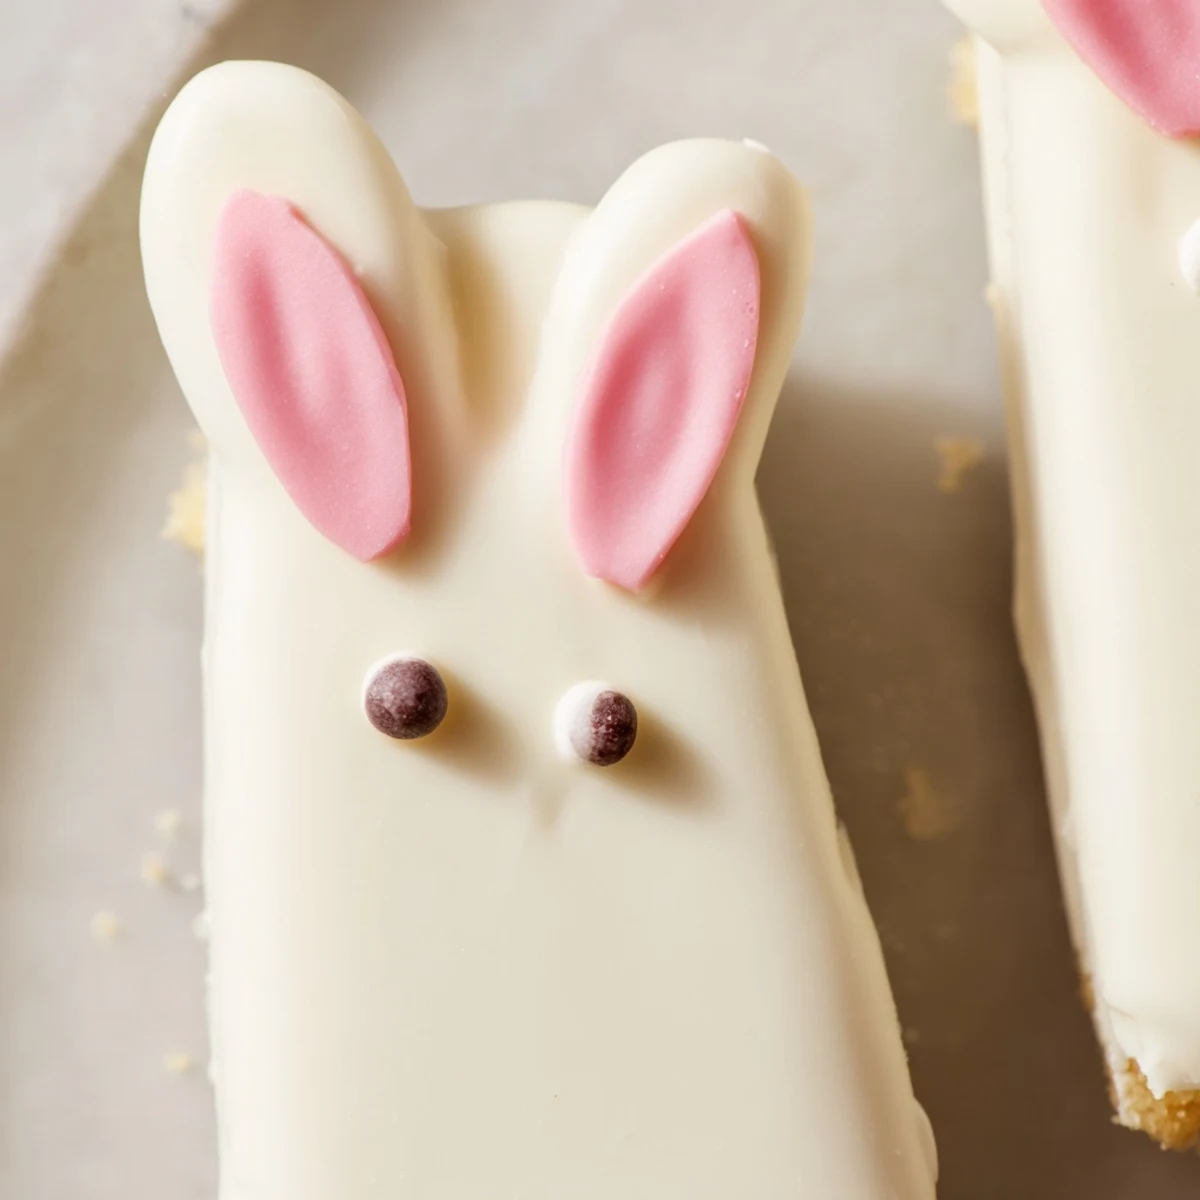
 These adorable bunny-shaped treats combine moist vanilla cake with a creamy white chocolate coating, creating the perfect festive dessert for Easter celebrations. The cake mixture uses simple ingredients like vanilla cake crumbs blended with cream cheese and butter for a dough-like consistency that holds its shape beautifully when dipped.
What makes these treats special is the interactive decorating process. Once coated in smooth white chocolate, you can personalize each bunny with candy eyes, sprinkles, and colored fondant ears. The result is a whimsical, Instagram-worthy dessert that tastes as good as it looks.
The preparation is straightforward—mix, shape, chill, dip, and decorate. Each batch yields eight generous portions, making them ideal for family gatherings, school parties, or as gifts. They're also customizable: swap the vanilla cake for chocolate or lemon, marble pink coloring into the white coating, or experiment with different decorative elements.
Store them in the refrigerator for up to three days, though they rarely last that long once people see these charming bunny faces!
The kitchen counter was covered in white chocolate splatters when my youngest announced these had to be bunny shaped, not just regular cake pops. I remember standing there with pink food coloring stained fingers, suddenly realizing Easter morning was about to get much more whimsical than planned. Now these little guys make an appearance every year, somehow getting slightly more elaborate with each batch.
Last year my sister accidentally made one bunny with three ears and it became the most coveted prize of the afternoon. Theres something about food on a stick that makes grown adults surprisingly competitive, and these bring out the kid in everyone at the table.
Ingredients
- Vanilla cake crumbs: I use leftover cupcakes or trim from a sheet cake, but storebought works perfectly fine too
- Cream cheese and butter: Room temperature is essential here, or you will fight the mixture endlessly
- Powdered sugar: Just enough to bind everything without making it cloyingly sweet
- White chocolate: Candy melts are easier to work with, but good quality white chocolate tastes infinitely better
- Cakesicle sticks: Treat yourself to the thicker ones, the skinny bows snap disappointingly often
Instructions
- Mix your cake base:
- Combine all ingredients in a medium bowl, mixing until the mixture holds together when squeezed but isnt sticky
- Shape and stick:
- Form into flattened ovals, insert sticks about halfway through, and chill until completely firm, at least 20 minutes
- Melt the coating:
- Heat chocolate in 30 second bursts, stirring thoroughly between each interval until smooth and pourable
- Dip and decorate:
- Submerge each cake pop completely, tap off excess gently, then immediately add decorations before the chocolate sets
 Pin It
 My niece now requests these by name every March, and watching her carefully choose which bunny ear to bite off first has become its own little tradition. They have somehow evolved from an impulse project into the thing everyone actually looks forward to most.
Getting The Shape Right
I flatten the ovals slightly thinner than seems necessary because the chocolate coating adds significant thickness. A silicone bunny shaped mold makes this easier, but honestly, hand shaping gives them more character and personality.
Making The Chocolate Work For You
White chocolate can be surprisingly finicky and prone to seizing, so I add a tiny drop of vegetable oil if it seems too thick. The marbled pink effect looks stunning and conveniently disguises any imperfect dipping technique.
Decoration Ideas That Actually Work
Fondant ears need to be attached while the chocolate is still wet or they will not stay put. Candy eyes are worth the investment for the instant personality they give each bunny.
- Pink pearl sprinkles make adorable tiny noses
- Heart shaped sprinkles positioned sideways become perfect ears
- A tiny dot of pink gel food coloring works for mouths
 Pin It
 These little bunnies have become the unexpected star of our Easter dessert table, and I cannot imagine the holiday without them anymore.
Recipe Questions
- → Can I use store-bought cake for the crumbs?
-
Absolutely! Store-bought cake or cupcakes work perfectly. Simply crumble them into fine pieces and mix with the binding ingredients. This shortcut saves time while still delivering delicious results.
- → What if my cakesicles fall off the sticks?
-
Ensure your cake mixture is firm enough before inserting sticks—refrigerate the shaped portions for at least 20-30 minutes. When inserting, push the stick about halfway through and gently press the mixture around it to secure. Chill again before dipping to prevent sliding.
- → Can I make these ahead of time?
-
Yes! These treats store beautifully in an airtight container in the refrigerator for up to 3 days. You can also freeze undecorated, coated cakesicles for up to a month. Thaw in the refrigerator before adding final decorations and serving.
- → What's the best way to melt white chocolate?
-
Melt in a microwave-safe bowl in 30-second intervals, stirring thoroughly between each burst. White chocolate scorches easily, so low and slow is key. If it seems too thick for dipping, add a teaspoon of coconut oil or vegetable shortening to smooth it out.
- → Can I use candy melts instead of real white chocolate?
-
Definitely! Candy melts are actually easier to work with since they're designed for dipping and coating. They set faster and hold their shape well at room temperature. Choose high-quality melts for the best flavor.
- → How do I prevent air bubbles when dipping?
-
Tap the stick gently against the bowl edge after dipping to release trapped air. Work slowly and smoothly when submerging each treat. If bubbles persist, use a toothpick to carefully pop them before the coating sets.