Pin It
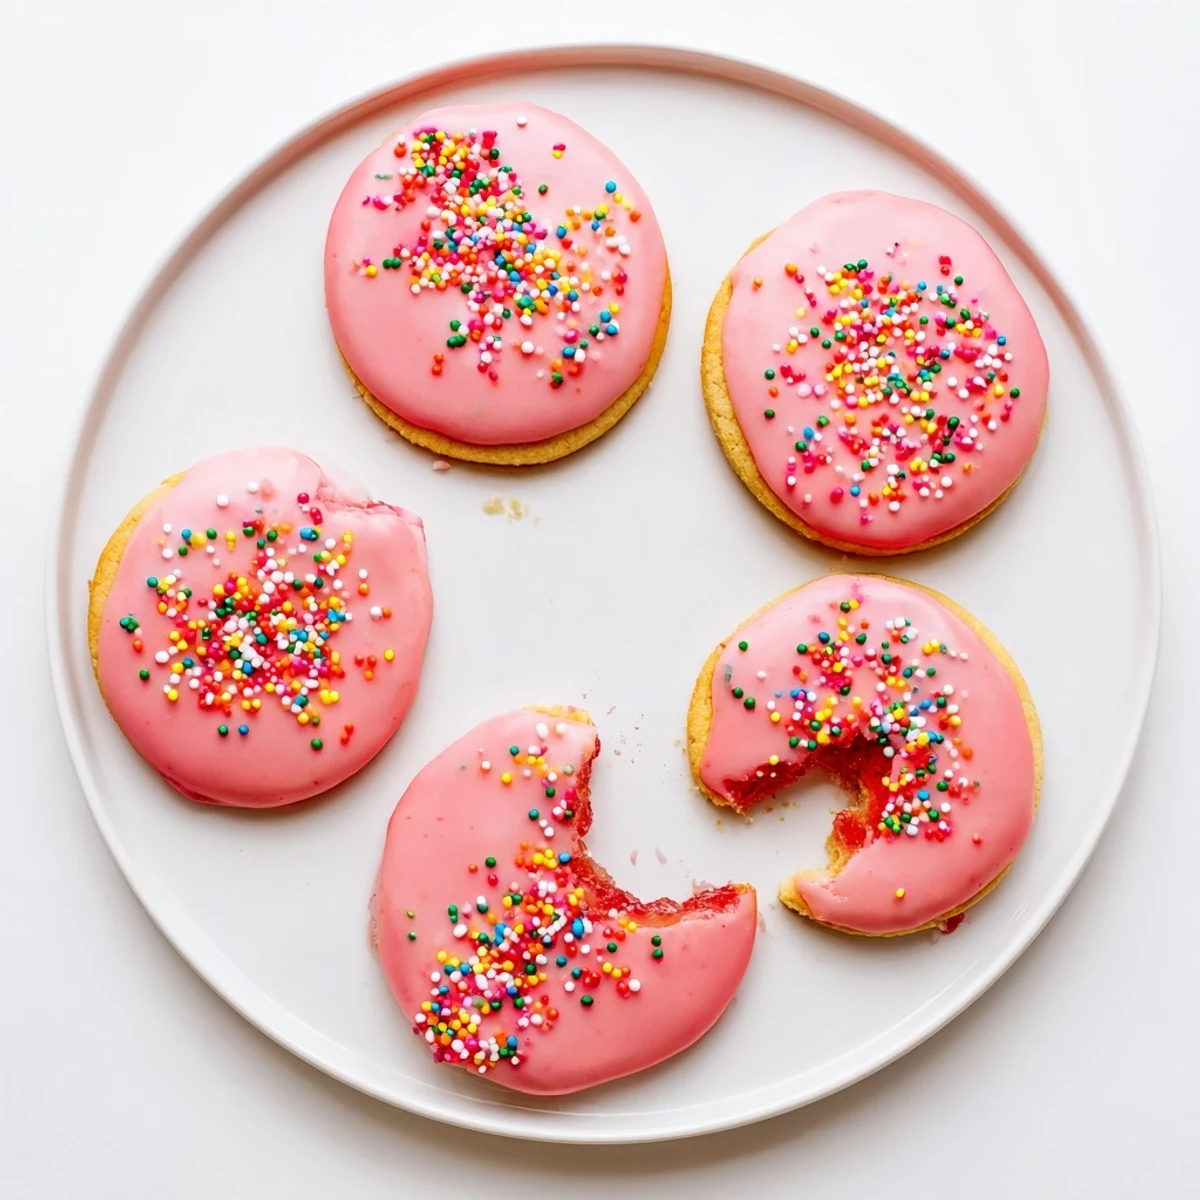
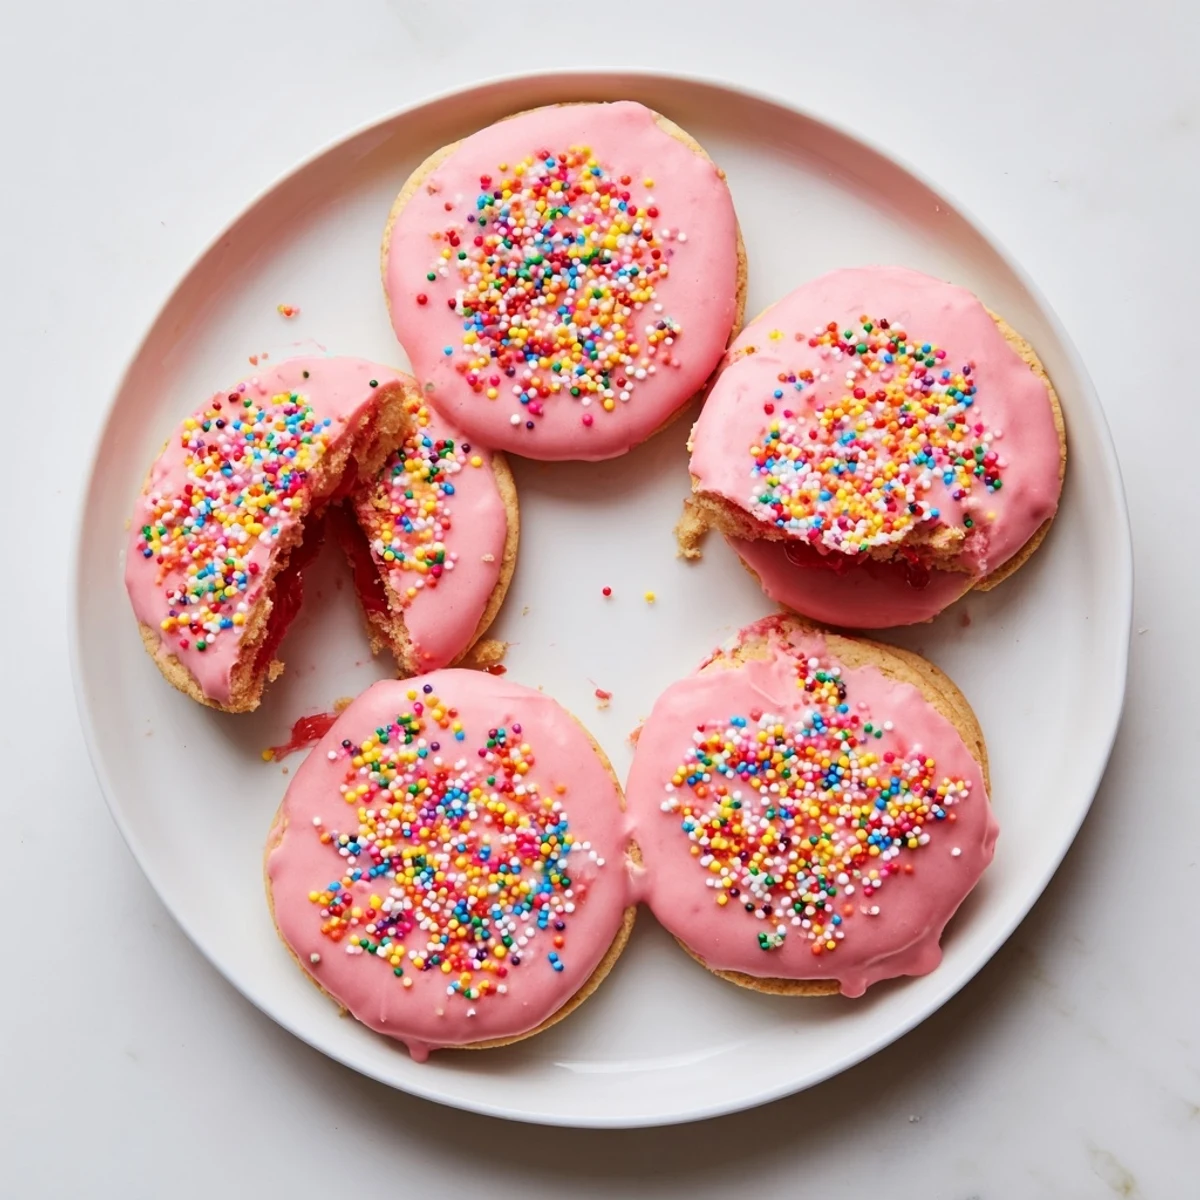
 These playful cookies capture everything you love about strawberry Pop Tarts in handheld cookie form. A tender buttery sugar cookie base encases a gooey strawberry jam center, sealed tight to keep all that fruity goodness inside during baking.
Once cooled, each cookie gets crowned with a glossy vanilla glaze tinted pink and finished with rainbow sprinkles for that iconic Pop Tart look. They're straightforward to make—just sandwich jam between two portions of cookie dough, bake until lightly golden, and decorate.
Perfect for bake sales, birthday parties, or whenever you're craving something sweet and nostalgic. Swap the strawberry jam for raspberry or blueberry to mix things up.
My kitchen smelled like a Saturday morning cartoon marathon the day I dreamed these up, all strawberry jam and butter and rainbow sprinkles scattered across every surface. I was trying to capture the magic of peeling open a foil Pop Tart packet, but in cookie form, something you could stack on a plate and hand to anyone walking through the door. The first batch disappeared before the glaze even set, which told me everything I needed to know.
I brought a tray of these to a potluck last summer and a friend stood over the plate eating four in a row without saying a word. She just pointed at me and mouthed thank you through a mouthful of cookie, jam dripping slightly down her thumb. That sealed it, these became my guaranteed crowd pleaser for every gathering since.
Ingredients
- All purpose flour (2 1/2 cups, 315 g): The backbone of the cookie, spoon and level it rather than scooping to avoid dense cookies.
- Baking powder (1/2 teaspoon): Just enough lift to keep them soft without turning cakey.
- Salt (1/2 teaspoon): Balances the sweetness and makes the butter flavor sing.
- Unsalted butter (1 cup, 225 g), softened: Really let it come to room temperature, cold butter leaves you with lumpy dough.
- Granulated sugar (3/4 cup, 150 g): Gives the edges that slight crispness while the center stays tender.
- Packed light brown sugar (1/4 cup, 50 g): A small amount for warmth and depth that white sugar alone cannot provide.
- Large egg (1): Binds everything together, pull it from the fridge early so it blends smoothly.
- Vanilla extract (2 teaspoons): Do not skimp here, good vanilla makes these taste homemade in the best way.
- Strawberry jam (1/2 cup, 160 g): Use a quality jam with real fruit, the filling is the star so make it count.
- Powdered sugar (1 cup, 120 g): For the glaze that makes these look like tiny frosted masterpieces.
- Milk (2 tablespoons): Adjust slightly for glaze thickness, you want it spreadable but not runny.
- Vanilla extract (1/2 teaspoon, for glaze): Rounds out the sweetness of the powdered sugar.
- Red or pink food coloring (optional): A drop or two gives that classic frosted Pop Tart look.
- Rainbow sprinkles: Nonpareils work beautifully, just press them gently into the wet glaze so they stick.
Instructions
- Get your oven ready:
- Preheat to 350 degrees F and line two baking sheets with parchment paper so nothing sticks and cleanup is effortless.
- Whisk the dry team:
- In a medium bowl, whisk together the flour, baking powder, and salt until evenly distributed and free of any clumps.
- Cream the butter and sugars:
- Beat the softened butter, granulated sugar, and brown sugar in a large bowl until the mixture looks pale, fluffy, and irresistible, then beat in the egg and vanilla until just combined.
- Bring the dough together:
- Gradually add the dry ingredients to the wet, mixing gently until the dough just comes together without any dry streaks remaining.
- Stuff and shape each cookie:
- Scoop one tablespoon of dough and flatten it in your palm, place a half teaspoon of strawberry jam in the center, then top with another tablespoon of dough and pinch the edges shut before gently rolling into a ball.
- Arrange on the sheets:
- Place each stuffed dough ball on the prepared baking sheets with about two inches of breathing room between them so they spread without merging.
- Bake until golden kissed:
- Bake for 12 minutes or until the edges turn the faintest gold, then let them rest on the sheet for five minutes before moving to a wire rack to cool completely.
- Glaze and celebrate:
- Whisk powdered sugar, milk, vanilla, and a drop of food coloring into a smooth thick glaze, spread it over each cooled cookie, shower with sprinkles, and let it set before serving.
 Pin It
 My niece helped me make these one rainy afternoon and she assigned herself official sprinkle manager with total seriousness. She lined them up by color and placed each one with surgical precision while I handled the glaze. We ate the ugly ones warm off the rack and nobody ever knew they existed.
Flavor Swaps Worth Trying
Raspberry jam swaps in beautifully if you want something a little more tart cutting through the sweet glaze. Blueberry works too, and a friend swears by apricot preserves with a tiny pinch of cinnamon in the dough. The cookie itself is a blank canvas so follow whatever jar is calling to you from the pantry shelf.
Getting the Glaze Just Right
The glaze should be thick enough to sit on top of the cookie without sliding off the edges, somewhere between honey and toothpaste. Add milk a tiny splash at a time because you can always thin it out but thickening it back up is frustrating. A small offset spatula makes spreading feel effortless, but the back of a spoon works just fine in a pinch.
Storing and Sharing
These keep beautifully in an airtight container at room temperature for about four days, though in my house they rarely last past day two. The glaze sets firm enough that you can stack them with a sheet of wax paper between layers if you need to transport them somewhere. For gifting, tuck them into a cellophane bag tied with baker twine and watch someone smile before they even open it.
- Freeze unglazed baked cookies for up to three months and glaze them fresh when you are ready to serve.
- A pinch of cinnamon in the dough adds a warmth that makes these taste like a childhood memory you cannot quite place.
- Always check your jam and sprinkle labels for allergens if you are sharing with a crowd.
 Pin It
 These cookies are pure playful joy on a plate, the kind of recipe that reminds you baking does not have to be serious to be wonderful. Make them once and they will become part of your rotation before you know it.
Recipe Questions
- → How do I prevent the jam from leaking out while baking?
-
Make sure to seal the edges of the cookie dough completely by pinching them together firmly and gently rolling the ball between your palms. Chilling the assembled cookies for 15 minutes before baking can also help the dough hold its shape and keep the filling contained.
- → Can I use homemade strawberry jam instead of store-bought?
-
Yes, homemade jam works beautifully. Just make sure it's thick and not too runny. If your homemade jam is on the thinner side, you can cook it down for a few extra minutes to reduce it, or chill it briefly before using so it's easier to portion into the cookie centers.
- → How should I store these cookies?
-
Store the glazed cookies in a single layer in an airtight container at room temperature for up to 3 days. If you need to stack them, place a sheet of parchment paper between layers to prevent the glaze from sticking. You can also freeze them without the glaze for up to 2 months.
- → Can I make the cookie dough ahead of time?
-
Absolutely. The cookie dough can be prepared and refrigerated for up to 2 days before assembling. You can also freeze the plain dough balls for up to a month. Thaw overnight in the refrigerator before filling with jam and baking.
- → What other fillings work well with these cookies?
-
Raspberry jam, blueberry preserves, and cherry filling are all delicious alternatives. For a chocolatey twist, try Nutella or chocolate hazelnut spread. Lemon curd also makes a bright, tangy filling that pairs wonderfully with the buttery cookie base.
- → Do I need to add food coloring to the glaze?
-
Food coloring is completely optional. The glaze tastes just as delicious plain with its natural white appearance. If you want that classic Pop Tart look, a small drop of pink or red food coloring goes a long way—start with a tiny amount and add more until you reach your desired shade.