 Pin It
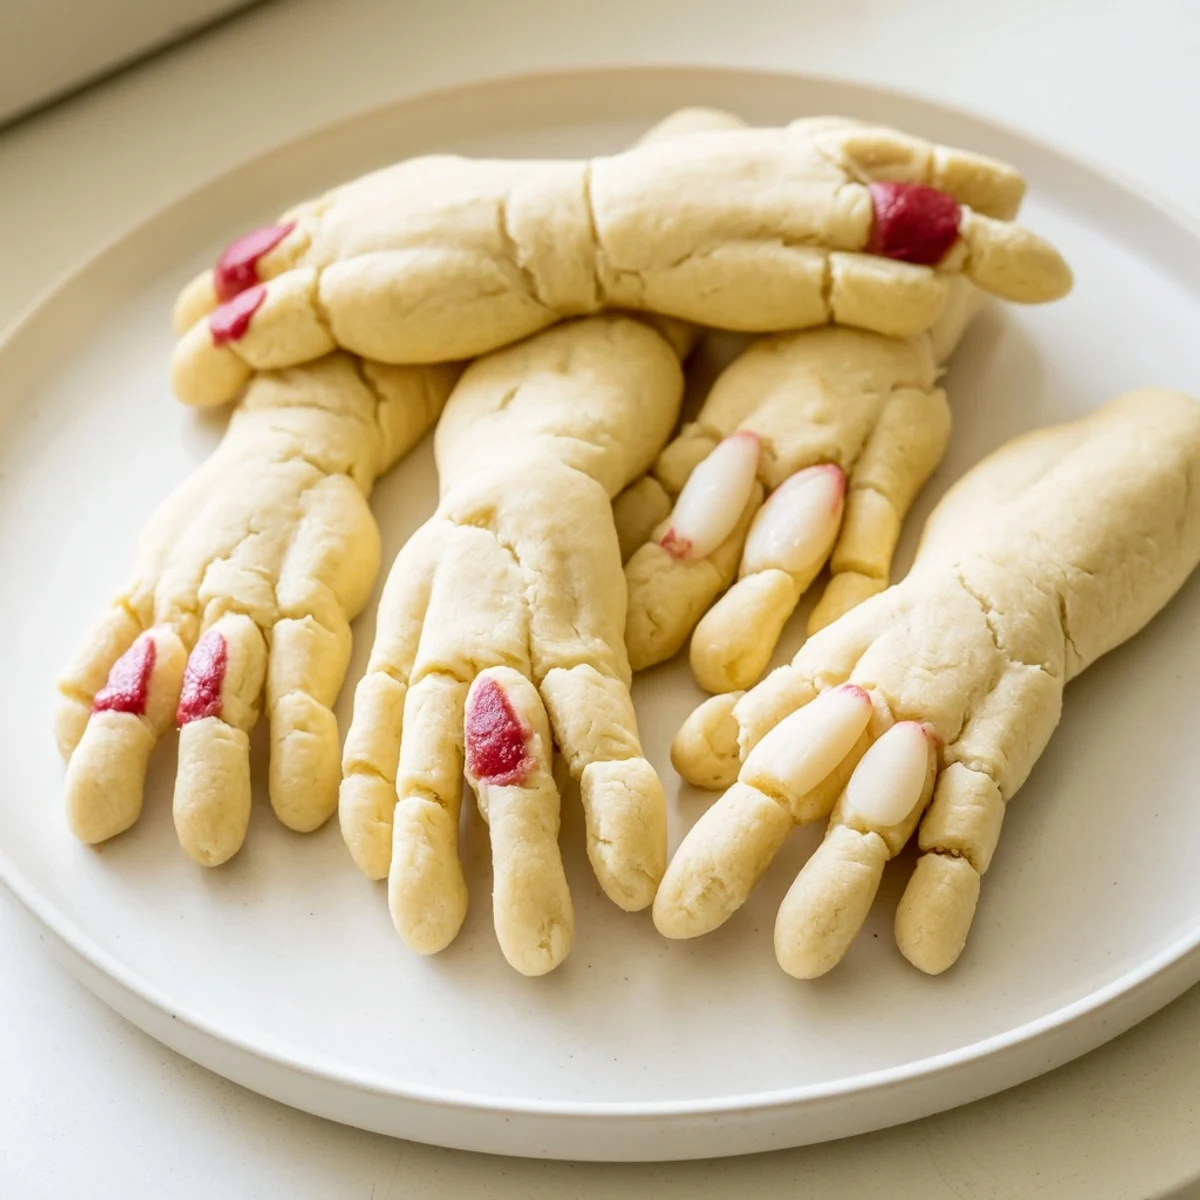
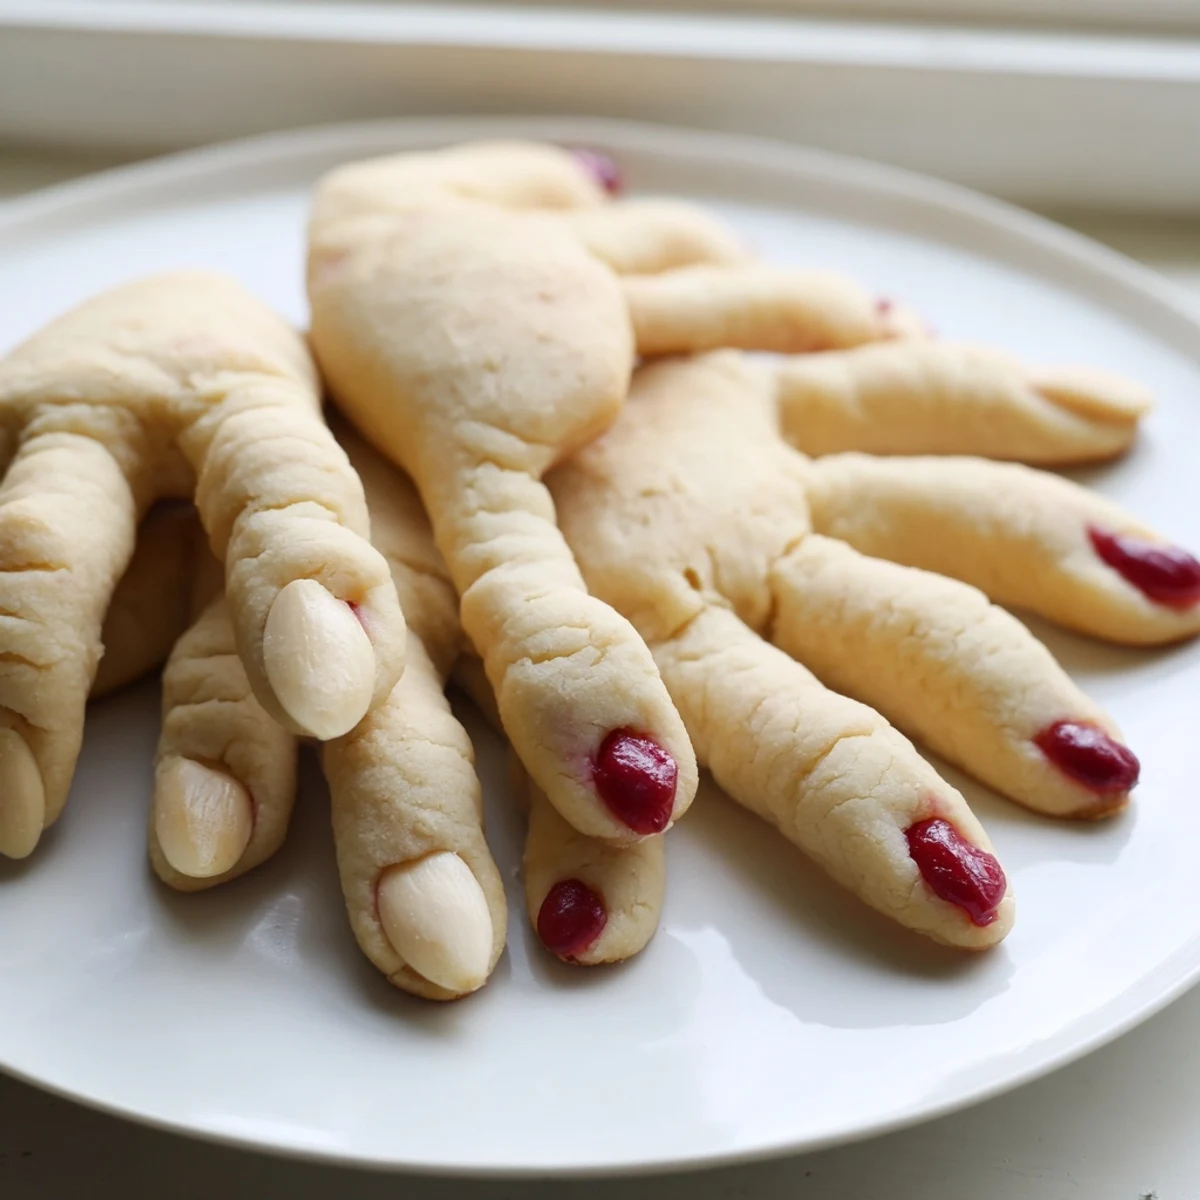
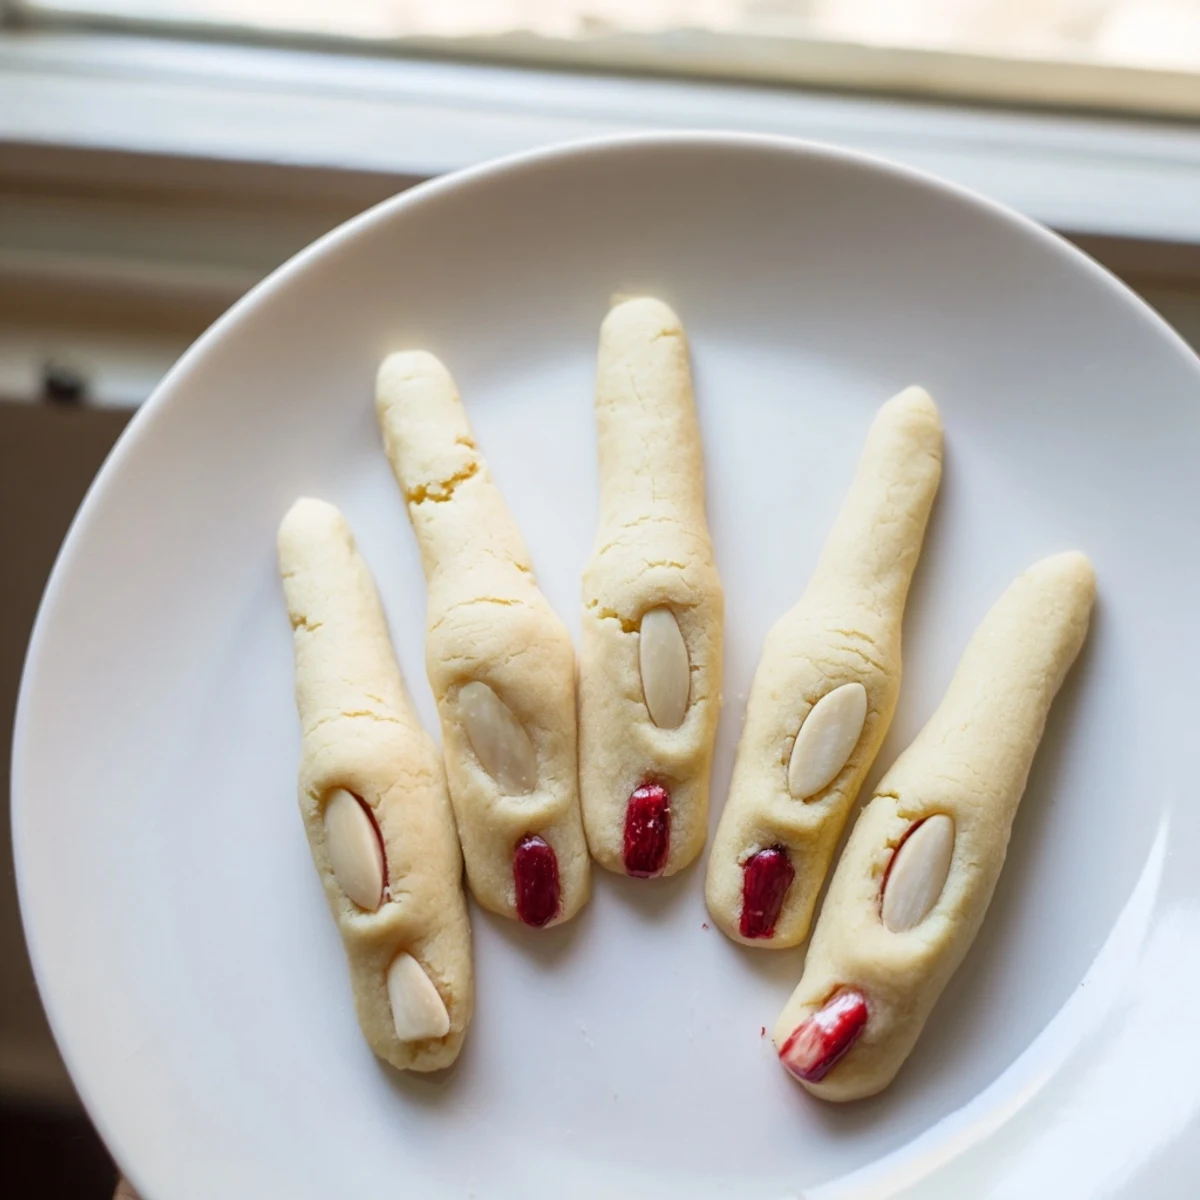
 These witch finger cookies combine buttery almond-flavored dough with a spooky presentation. Shape the dough into 3-4 inch fingers, score knuckle lines with a knife, and press blanched almonds at the tips for fingernails. After baking, add red gel or strawberry jam beneath the almonds for a gruesome bloody effect. The vanilla and almond extract create a rich flavor while the simple decoration makes them irresistible at Halloween gatherings.
The first Halloween party I hosted as an adult felt incomplete without something genuinely unsettling to serve. My sister suggested these witch finger cookies, and we spent an entire Saturday afternoon hunched over the kitchen table, perfecting our knuckle-carving technique and giggling like schoolgirls every time a particularly crooked finger came out of the oven.
Last year my neighbor actually hesitated before taking a bite, convinced I had purchased realistic props from a Halloween store. The moment she bit into that buttery, vanilla-scented cookie and realized it was real food, her expression shifted from horror to pure delight.
Ingredients
- Unsalted butter: Softened to room temperature helps create that perfectly tender crumb that melts in your mouth
- Granulated sugar: Cream this thoroughly with the butter until it looks pale and fluffy for the best texture
- Pure vanilla extract: The real stuff makes a noticeable difference in the final flavor
- Almond extract: This is what gives the cookies their distinctively sophisticated taste
- All-purpose flour: Measure by spooning into your cup and leveling off for accuracy
- Baking powder: Make sure its fresh so your fingers dont come out flat and sad
- Salt: Just enough to balance the sweetness without making them taste savory
- Blanched almonds: The naked almonds look eerily realistic as fingernails
- Red gel food coloring: A tiny dab goes a long way for that freshly manicured horror effect
Instructions
- Prep your oven and pans:
- Preheat to 325°F and line two baking sheets with parchment paper so nothing sticks
- Cream the butter and sugar:
- Beat them together until the mixture looks pale and fluffy, which takes about 3 minutes
- Add the wet ingredients:
- Mix in the egg, vanilla, and almond extract until everything is fully incorporated
- Combine the dry ingredients:
- Whisk the flour, baking powder, and salt in a separate bowl so they are evenly distributed
- Form the dough:
- Gradually mix the dry ingredients into the wet ones until the dough just comes together
- Shape the fingers:
- Roll tablespoon portions of dough into 3 to 4 inch logs, making them slightly uneven for realism
- Add the details:
- Use a knife to gently score knuckle lines and press an almond into one end for a fingernail
- Bake until golden:
- Bake for 18 to 20 minutes until the bottoms are lightly golden and they are set on top
- Create the bloody effect:
- Carefully remove each almond, add a drop of red coloring or jam, and press back into place
- Cool completely:
- Let them sit on the baking sheet for a few minutes before moving to a wire rack
 Pin It
 My niece now requests these every single October, and the tradition has evolved into a full afternoon of finger-shaping while watching horror movies and drinking hot apple cider.
Making Them Extra Creepy
I have discovered that tinting small portions of dough with green or gray food coloring creates variety that makes the platter look even more unsettling. You can also bend some fingers at awkward angles before baking to look like they were broken and healed poorly.
Serving Suggestions
These cookies pair perfectly with hot mulled cider or Halloween-themed cocktails. I like to arrange them on a wooden cutting board or platter lined with fake spider webs for maximum impact.
Storage and Make Ahead Tips
The dough actually freezes beautifully, so I often double the batch and save half for unexpected gatherings. You can also bake and freeze the finished cookies for up to a month, though the bloody effect works best when added fresh before serving.
- Store baked cookies in an airtight container at room temperature for up to 5 days
- If the almonds loosen over time, just add a bit more jam before serving
- These ship surprisingly well if you are sending care packages to faraway friends
 Pin It
 There is something deeply satisfying about serving food that makes people both recoil and reach for more at the same time.
Recipe Questions
- → Can I make witch finger cookies ahead of time?
-
Yes, you can prepare the dough up to 3 days in advance and refrigerate. Shape and bake when ready. Baked cookies store well in an airtight container for up to a week.
- → What can I use instead of almonds for fingernails?
-
Sliced almonds work well for a different look. For nut-free options, try pecan halves, pumpkin seeds, or shape dough into claw-like tips without any topping.
- → How do I get the best bloody effect?
-
Strawberry or raspberry jam creates the most realistic dried blood look. Apply it warm after baking, then press the almond firmly back into place. Red gel coloring works for a fresher appearance.
- → Can I freeze witch finger cookies?
-
Freeze unbaked shaped fingers on a baking sheet, then transfer to freezer bags. Bake from frozen, adding 2-3 minutes to baking time. Already baked cookies also freeze well for up to 3 months.
- → Why did my cookies lose their finger shape?
-
The dough may have been too warm or overworked. Chill the dough for 30 minutes before shaping if it's soft. Handle gently and don't reroll scraps too many times, which warms the butter.